
If your reimbursement falls into the “UGA OneSource” category, your reimbursement package should include:
- Your itemized, paid receipt(s)
- “Proof of Event“: e.g. email invitation to participants, printed flyer, meeting agenda, any supporting documentation.
- A signed and completed UGA entertainment form.
- You only need to complete 2-5. Since this reimbursement will be processed electronically by you, your signature is not required.
- If you have a separate sign-in sheet or RSVP form, you may write “see attached” on the list of attendees portion of the form and turn in the list of names as well.
- If it was a large event without a sign-in sheet or RSVP form, please fill in as many names as you can reasonably fit before writing “students – 20, faculty – 10” etc.
- If you do not already have/know your speed type/accounting tag please reach out to Laura Leachman.
- Go ahead and scan your package to your desktop or wherever you keep your reimbursement paperwork as you will need to attach it later. It is wise to keep these packages accessible until your reimbursement is fully processed.
Note: OneSource reimbursements typically take 24 hours to process if all information is included during the initial submission. Otherwise, reimbursement will be delayed until proper documentation/information is provided.
It is advisable that you obtain prior permission for reimbursement from the appropriate account holder before incurring expenses.
Step 1
Log into financials.onesource.uga.edu using your my ID, password, and arch pass duo pass code/call/push notification. If you are accessing the website off campus you will also need to have a Cisco any-connect VPN installed on your computer.
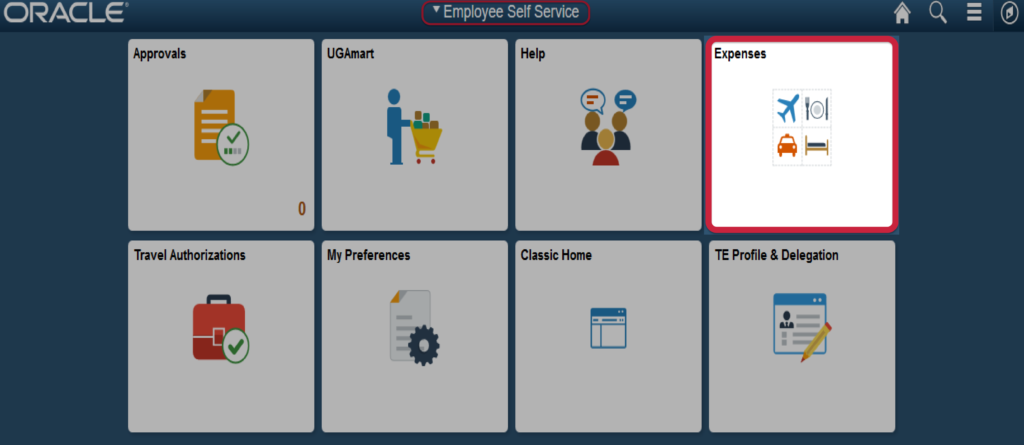
Once logged in, make sure the screen says “Employee Self Service” at the top, then click “Expenses.”
Step 2
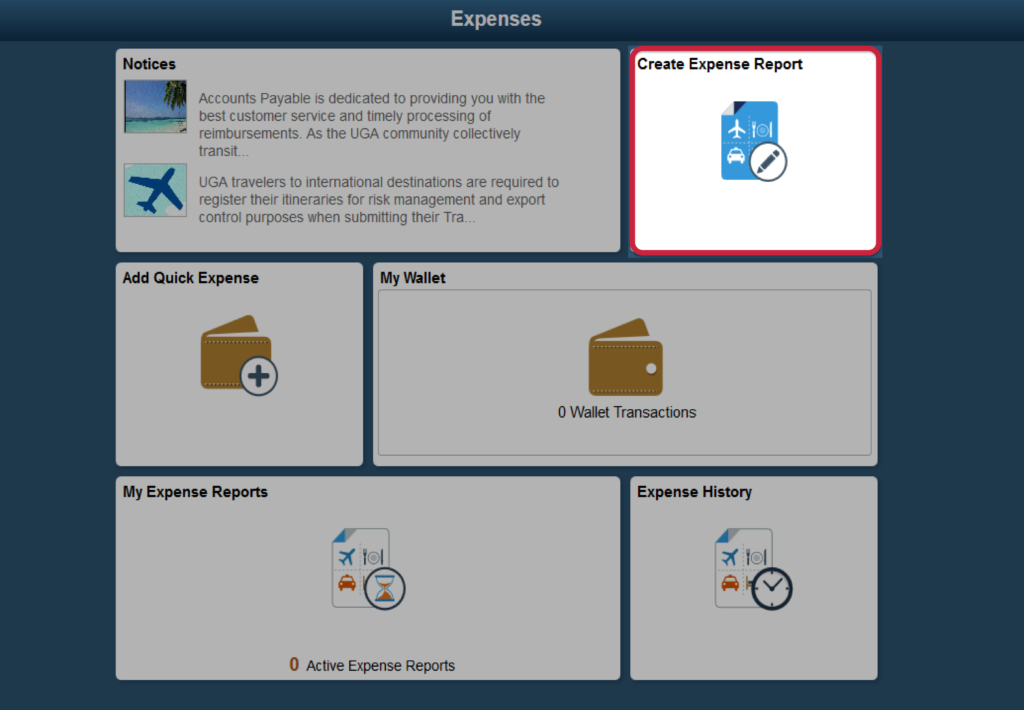
On the next screen click on “Create Expense Report.”
Step 3
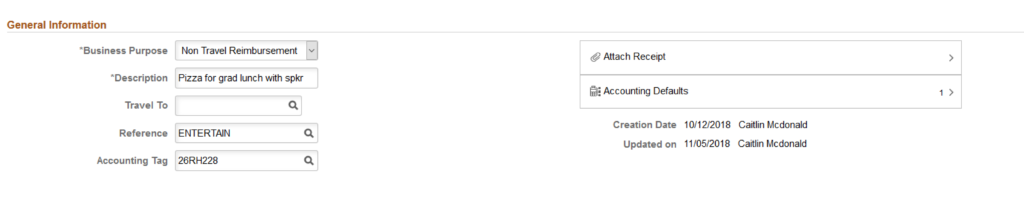
Fill in the General Information of your purchase(s).
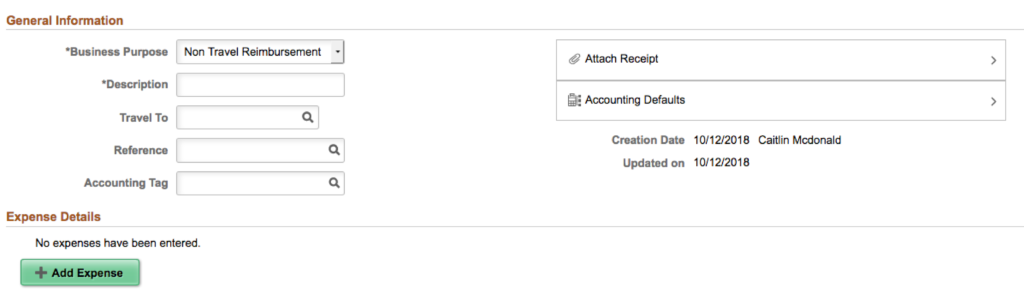
“Business Purpose”: should show Non-Travel Reimbursement.
“Description”: should include what the reimbursement is for, including your speed type
- e.g. “pizza for grad lunch with speaker Jane Smith, 26XX000”)
“Travel To”: Field should not have anything entered. Ignore since this is not travel-related.
“Reference”: Select “Entertainment” from the drop down after clicking the magnifying glass.
“Accounting Tag”: Same as speed type.
“Attach Receipt“: Follow prompts to upload your reimbursement paperwork.
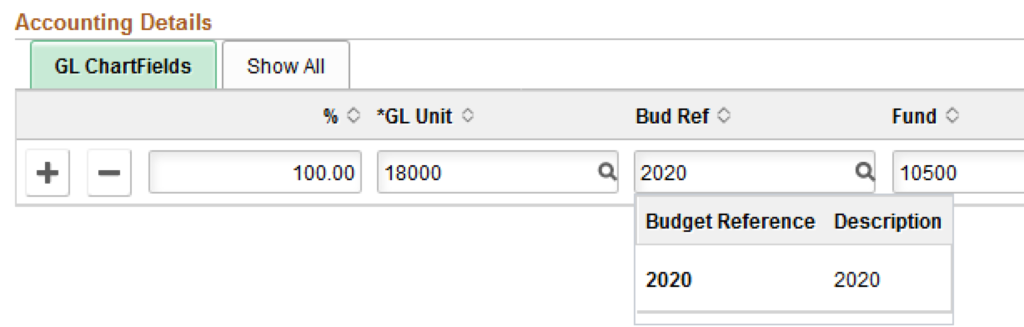
“Accounting Defaults”: Your chart string should have auto-filled when you entered your accounting tag, except for the budget reference. You must enter the budget reference or your request will be rejected. It should match the current fiscal year we are operating in (e.g., 2020, 2021, 2022, etc.). If you are unsure please email Laura Leachman.
After entering the date click “Done” to return to the general information screen.
Step 4
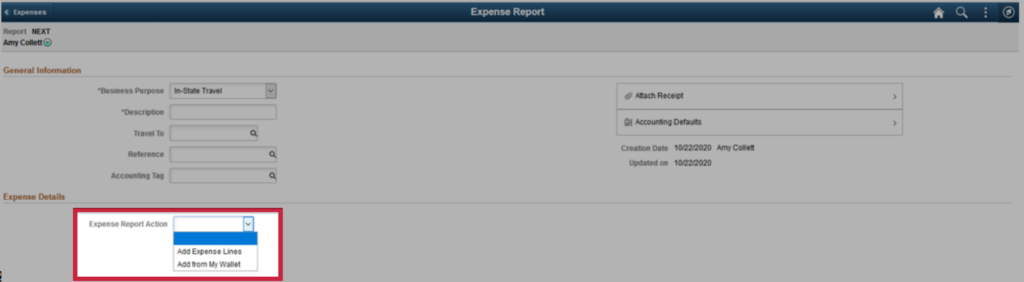
Expense Details
Click on the dropdown box next to “Expense Report Action“.
Choose the appropriate way to add your expenses.
- Some employees may have added their expenses to their wallet already. If this is the case (and is very helpful for those on travel) then you can choose “Add from My Wallet” and it will pre-load the details of the expense for you.
- Otherwise, choose “Add Expense Lines” and you will enter details of your expense on the next screen.
Step 5
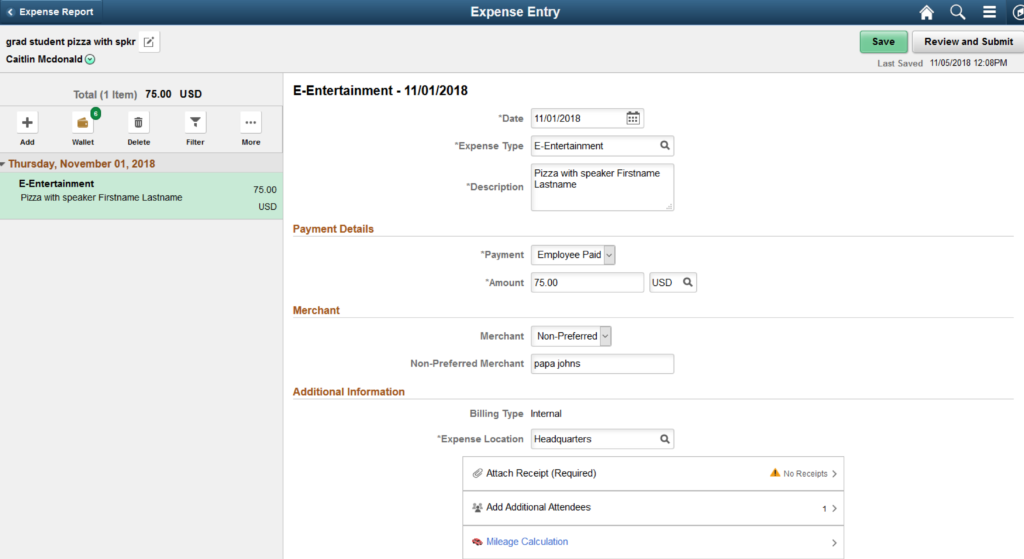
“Date”: Should reflect the date of purchase on your receipt.
“Expense Type“: See next slide on changing this.
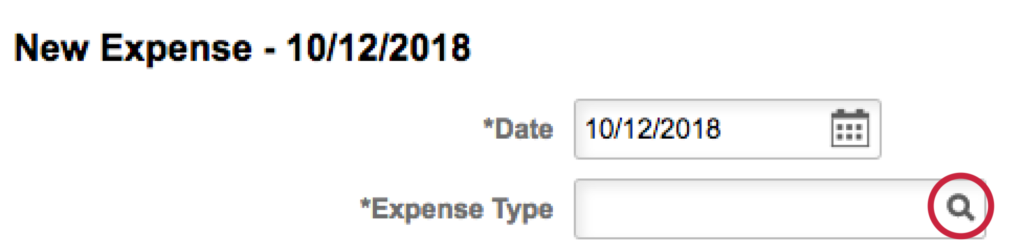
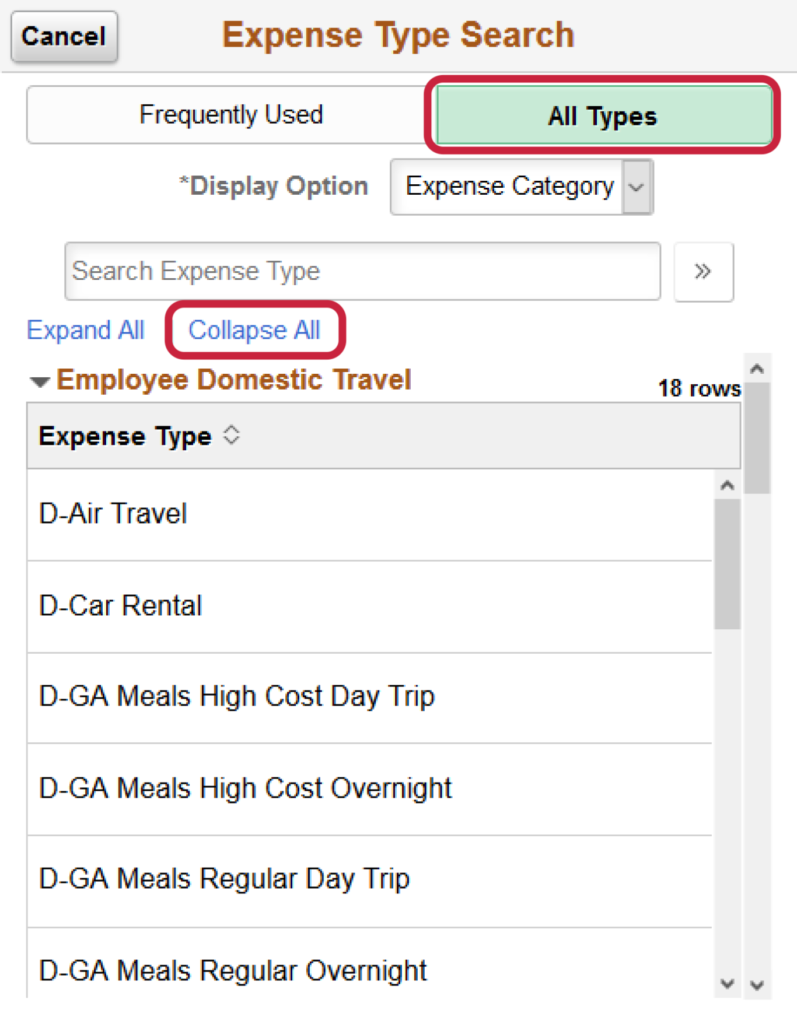
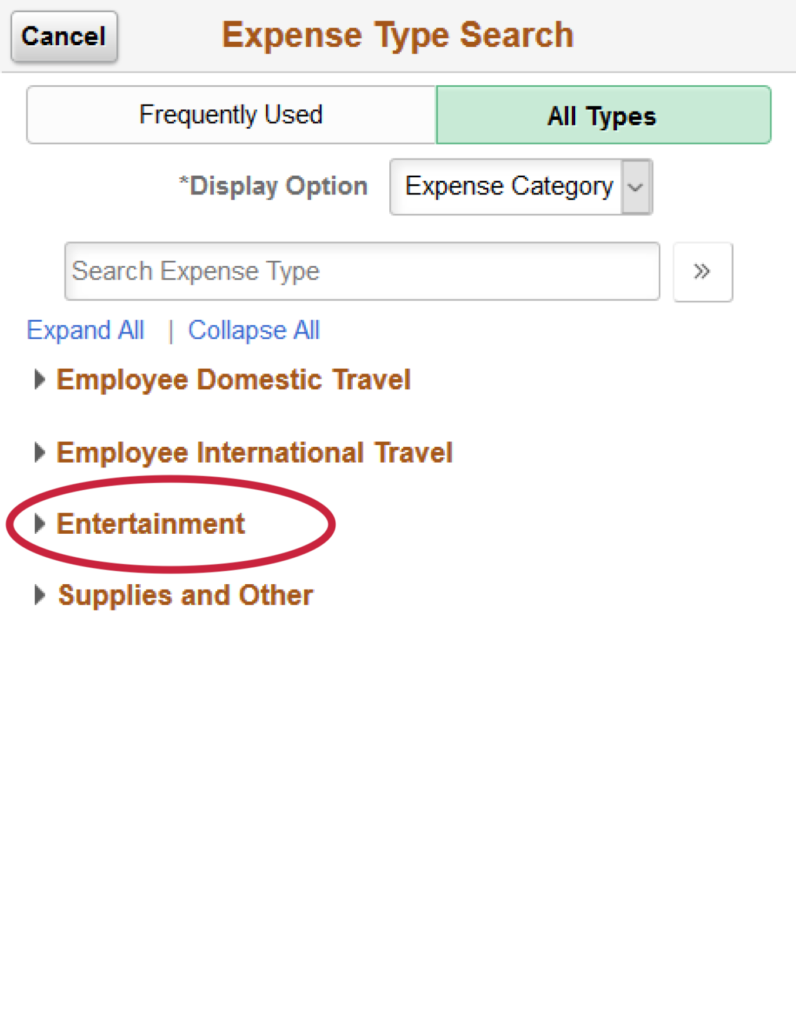
When you first click on the “Expense Type” magnifying glass it will show you “Frequently Used” options. Click “All Types” then “Collapse All” to see the “Entertainment” category.
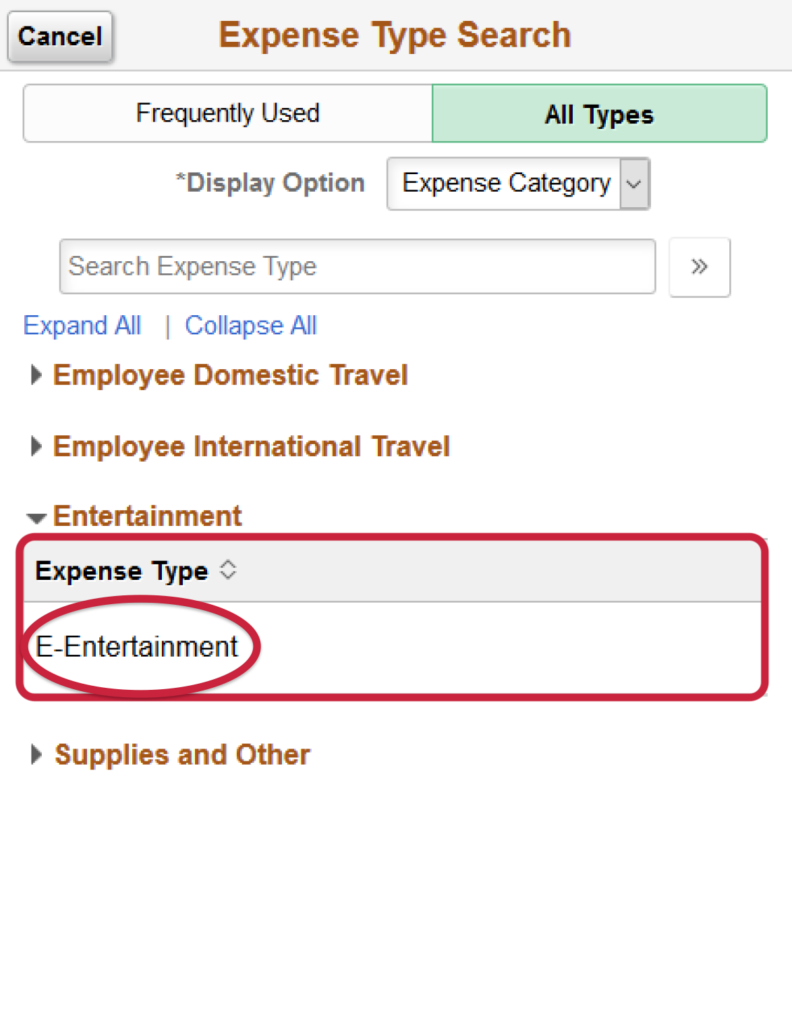
From there the only choice is “Entertainment,” which you will select.

When you select “Entertainment” as the expense type, a “Merchant” section will appear. The drop down should always say “Non-Preferred.” Fill in the vendor you used in the “Non-Preferred Merchant” line.
“Description“: Include a description of the purchase including your speed type
- e.g. pizza for grad student meeting with seminar speaker “FirstName, LastName, 26XX000.”
“Payment“: Should always show employee paid.
“Amount“: Fill in the amount on the corresponding receipt. If you are only requesting partial reimbursement please add a note about that in the description (e.g. partial reimb for pizza for grad student meeting with seminar speaker FirstName LastName, 26XX000”).
“Merchant/Non-Preferred Merchant“: See above for information on this.
“Expense Location“: type “Headquarters.”
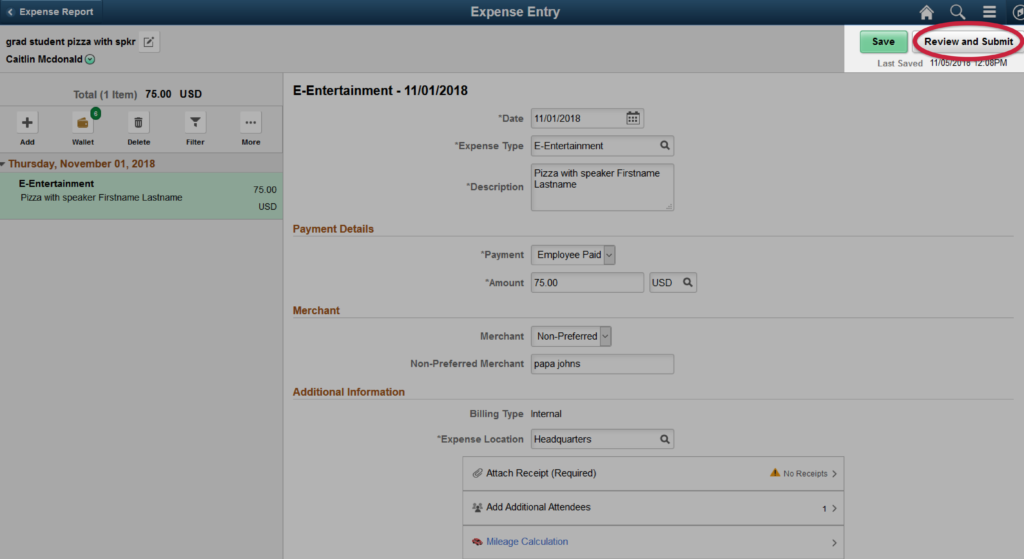
After you have entered details for all your receipts and are ready to submit, click “Review and Submit” in the upper right hand corner.
Step 6
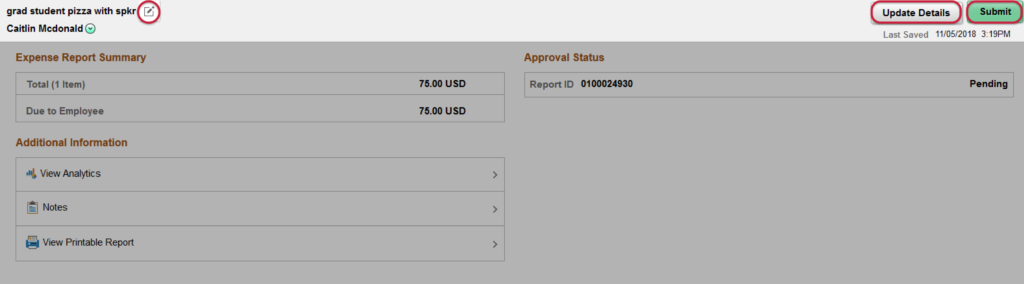
Your next screen should look like this.
- If you need to update any information on the “General Information” screen,
- Click the square icon next to the description (top-left).
- If you need to look at/add another expense/receipt
- Click “Update Details” (top-right).
- If you are 100% ready to submit
- Click “Submit” (top-right).
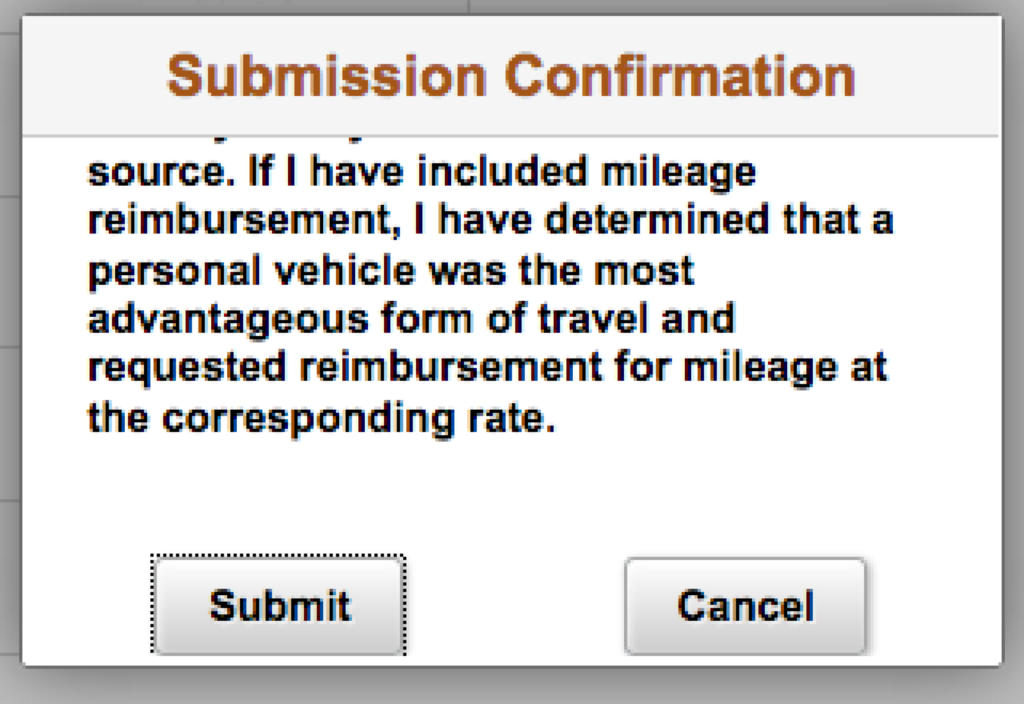
Once you click “Submit“, a box will pop-up asking you to confirm your submission.
Congratulations! Your reimbursement is now under review. The Business Office will be in touch if further information is needed else you will receive automatic notification via email from the system of your reimbursement and deposit.