
Step 1
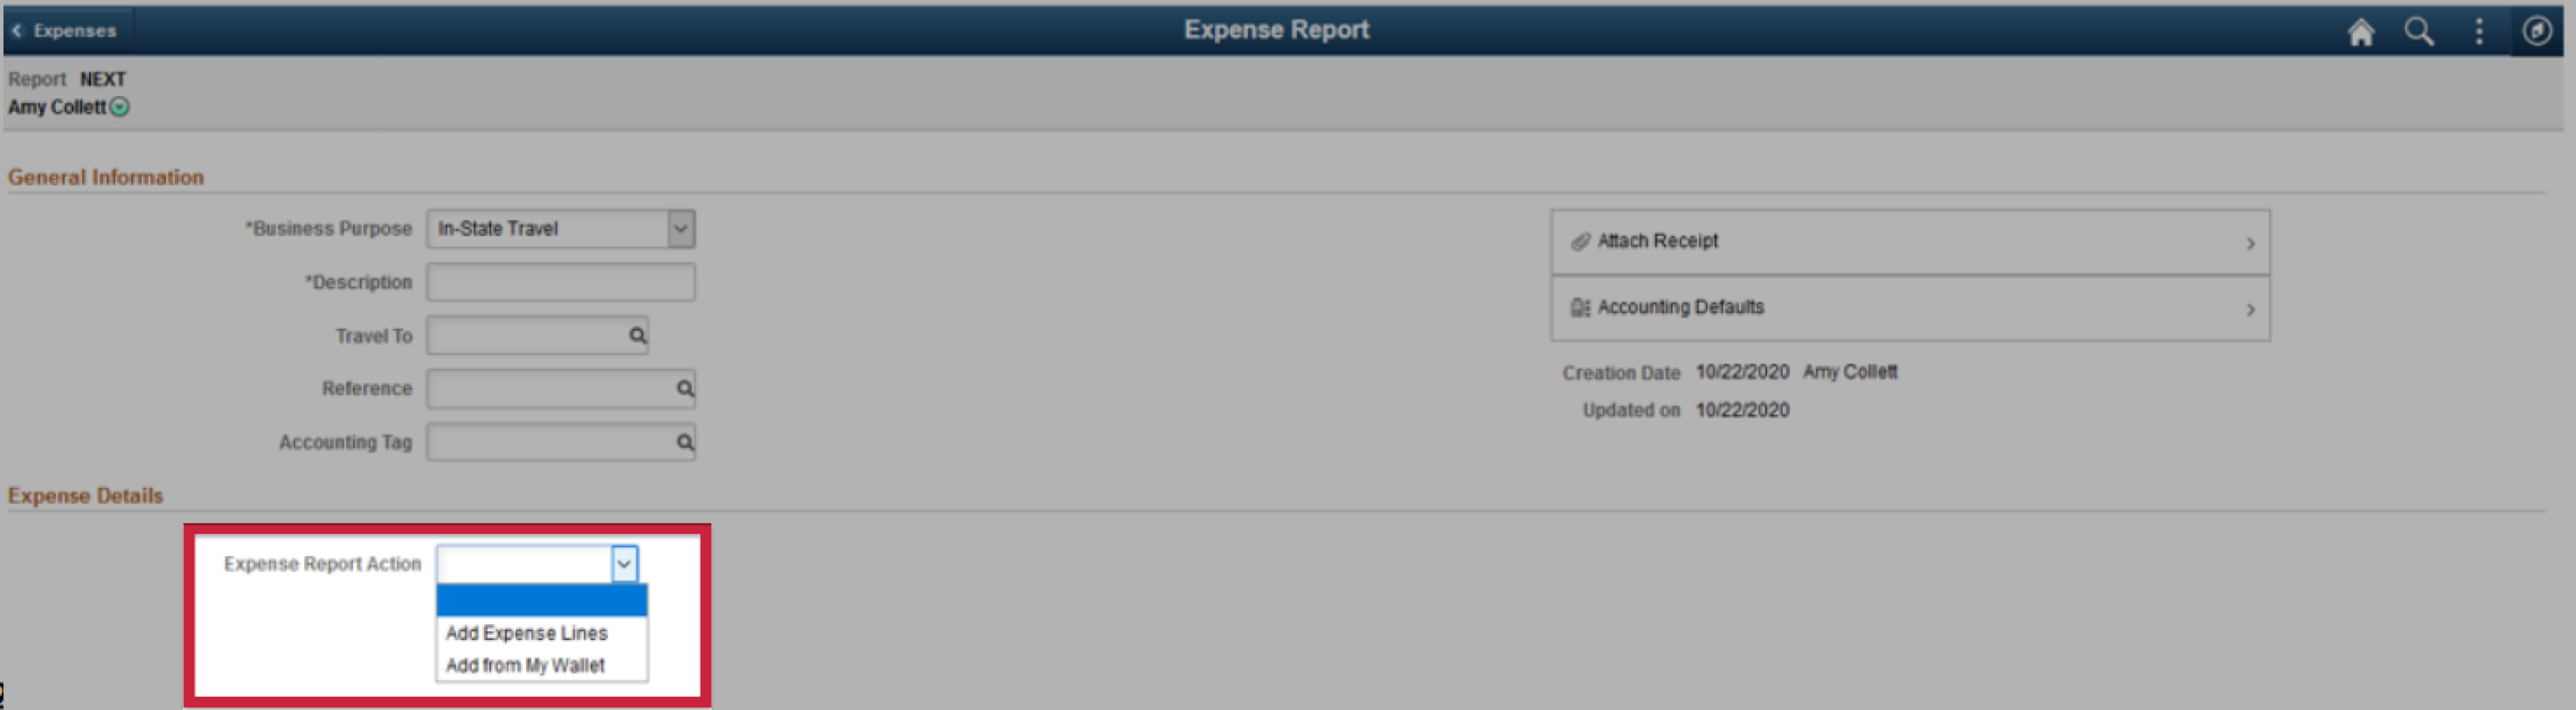
Click on the dropdown box next to “Expense Report Action“. Choose the appropriate way to add your expenses.
Some employees may have added their expenses to their wallet already. If this is the case (and is very helpful for those on travel) then you can choose “Add from My Wallet” and it will pre-load the details of the expense for you.
Otherwise, choose “Add Expense Lines” and you will enter details of your expense on the next screen.
Step 2
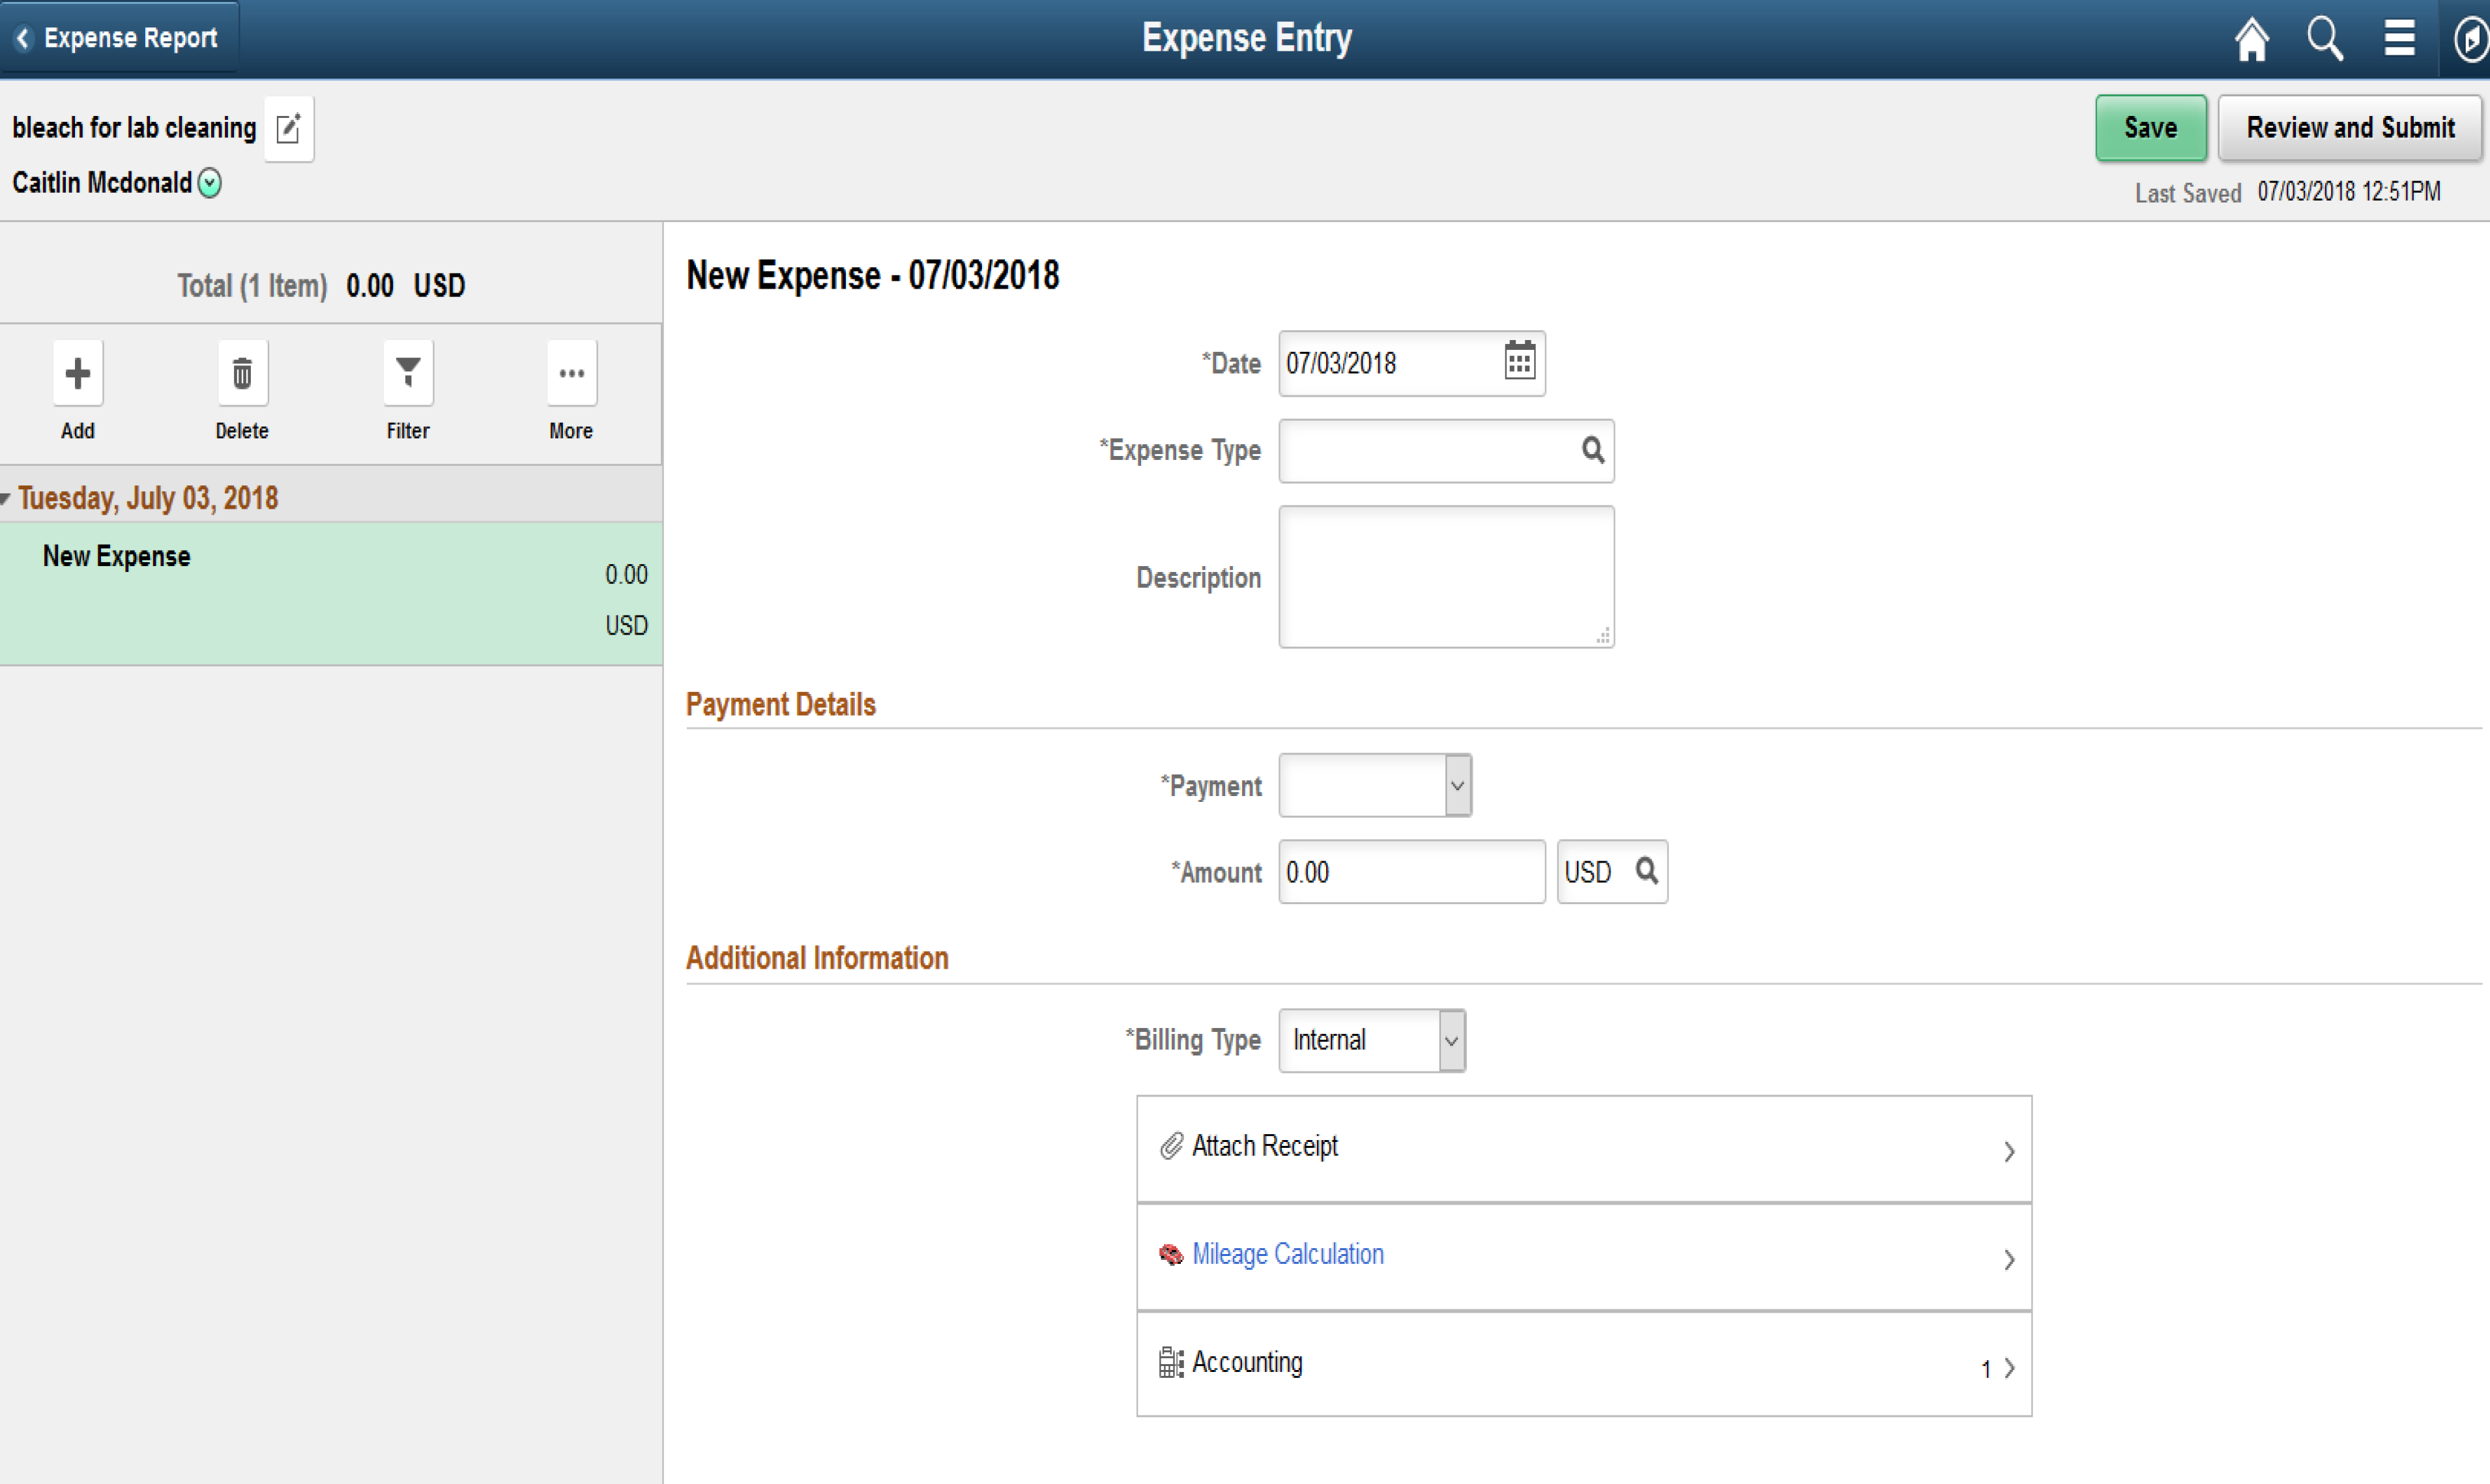
- “Date”: should reflect the date of purchase on your receipt.
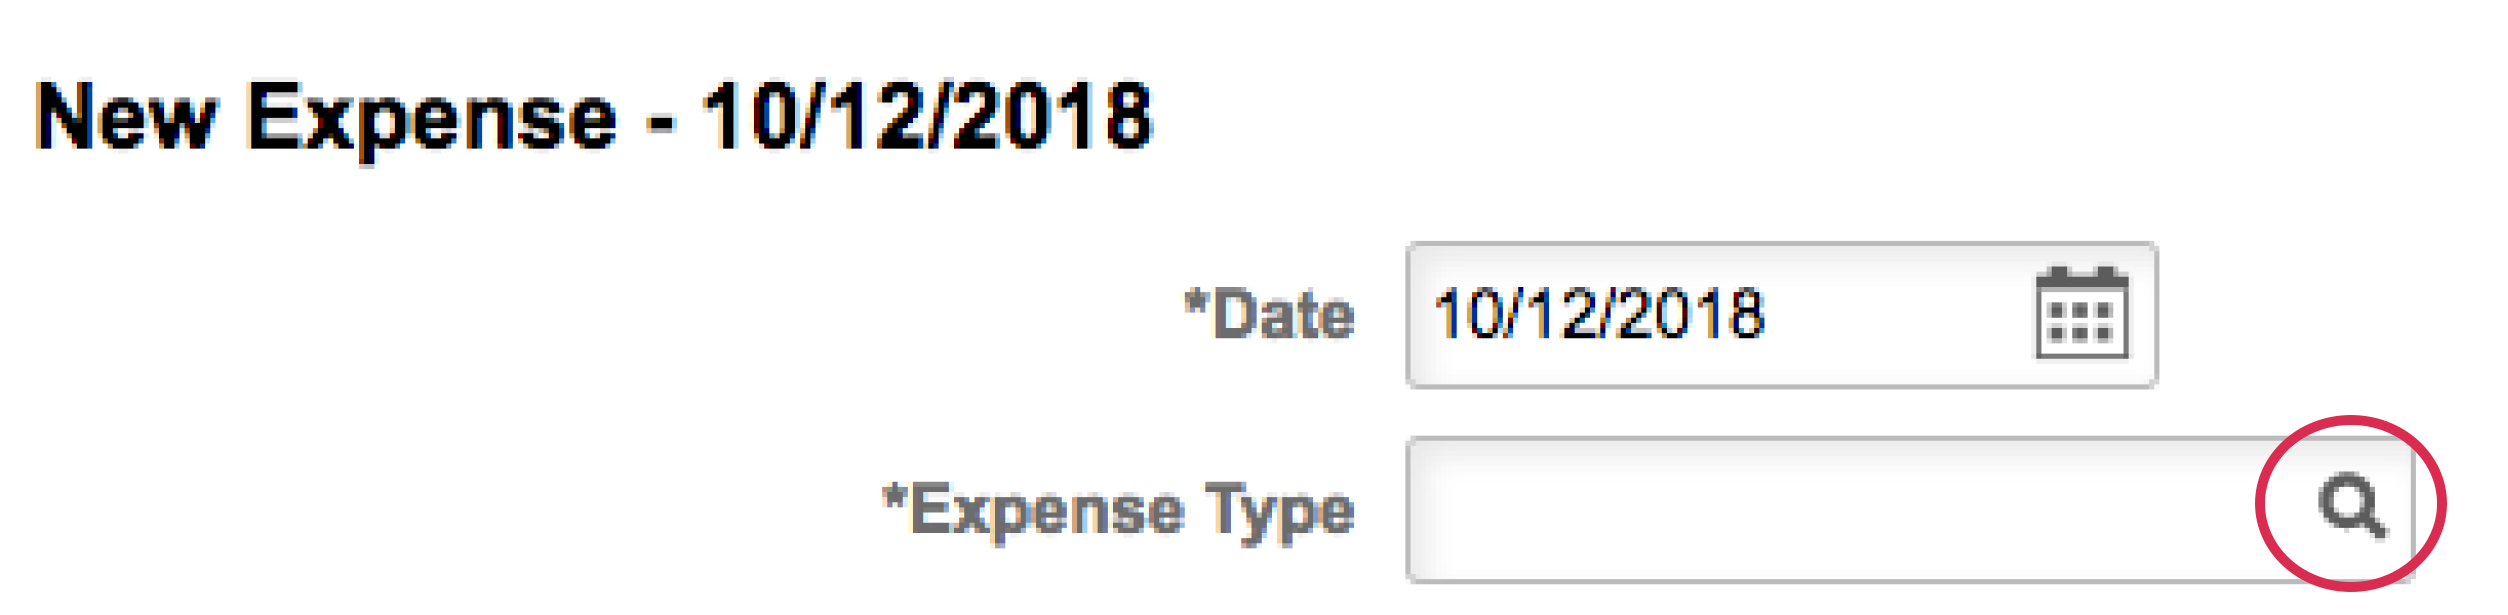
- “Expense Type“: To choose an expense type, click the magnifying glass in the “Expense Type” box.
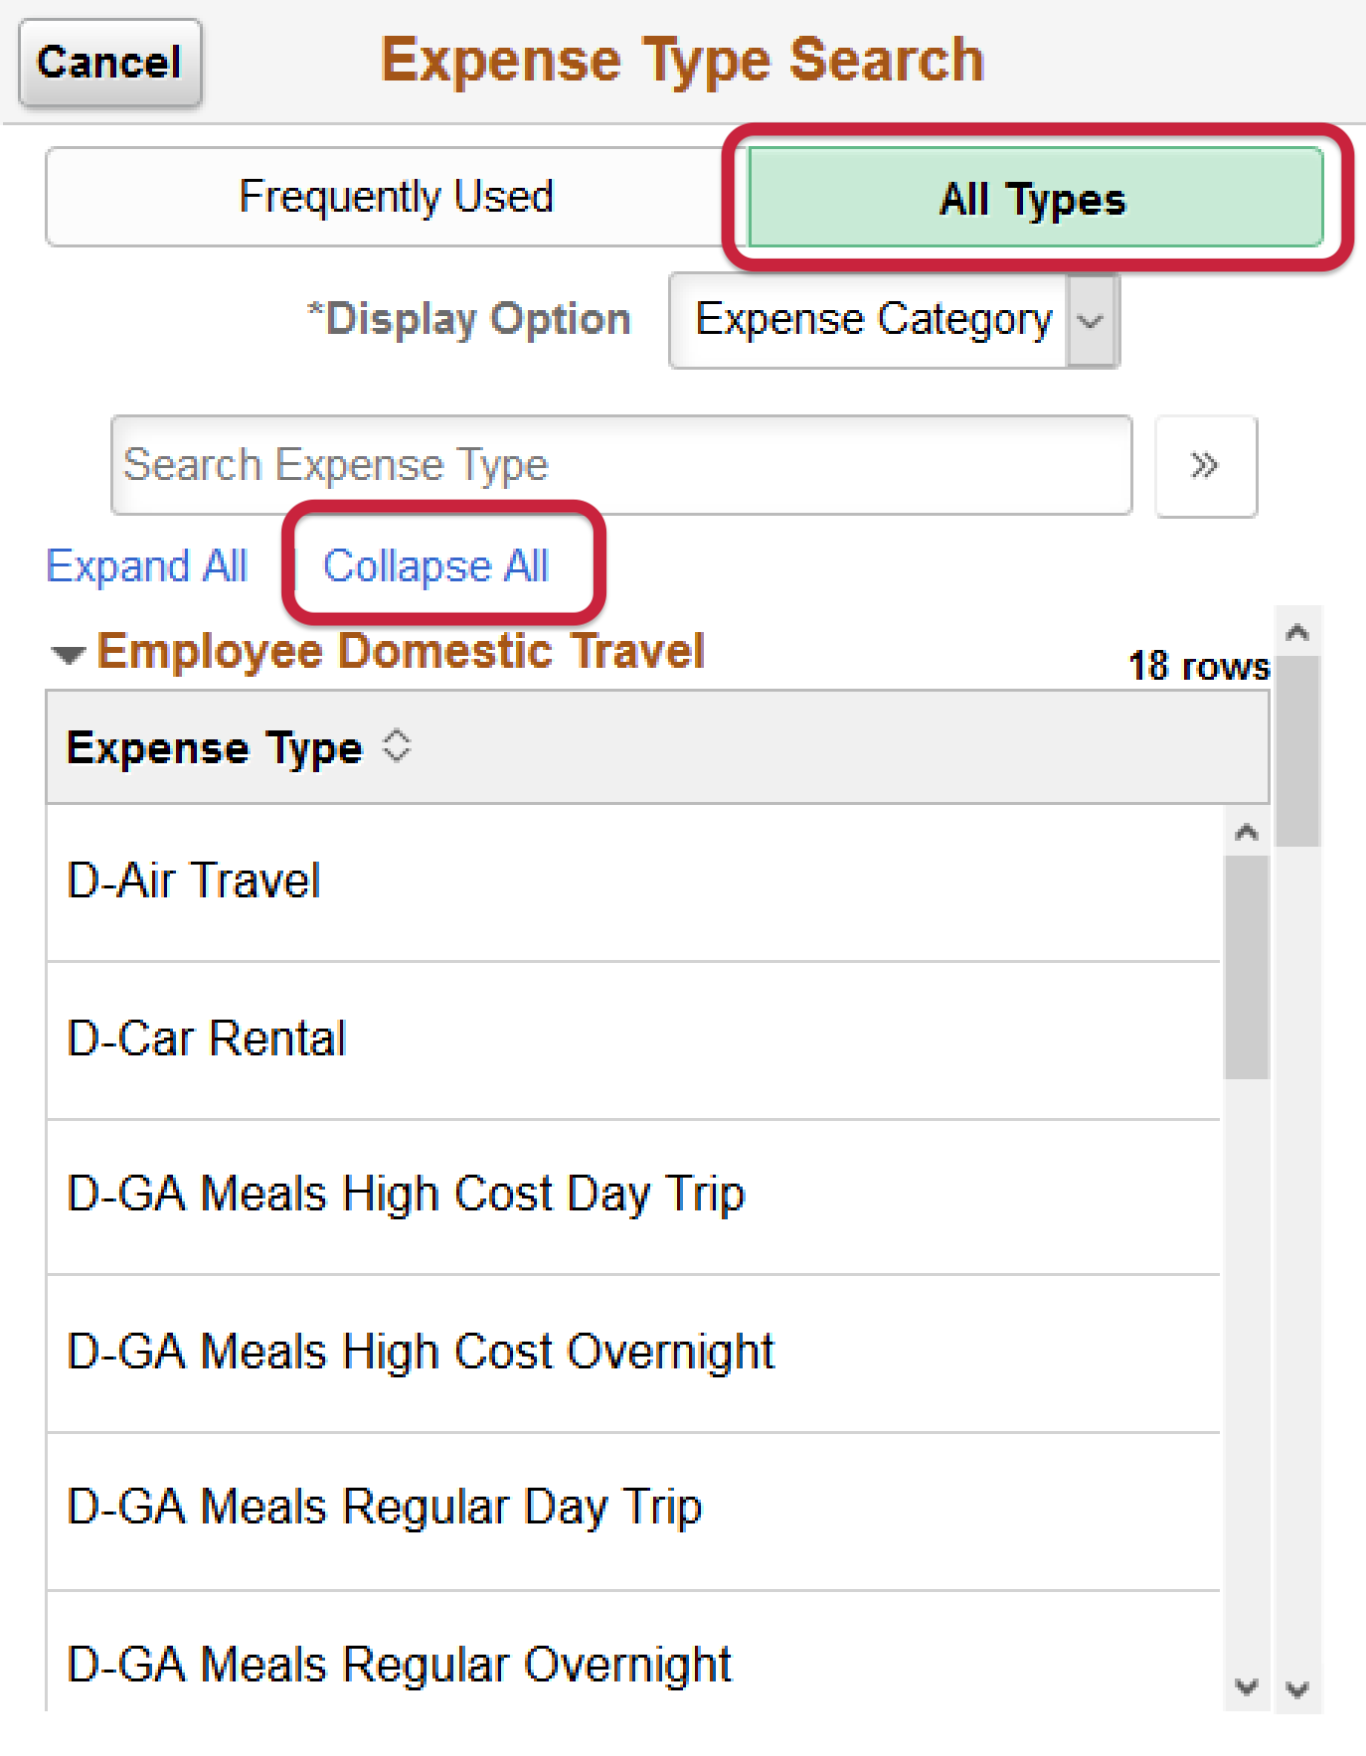
- When you first click on the “Expense Type” magnifying glass icon it will show you “Frequently Used” options. Click “All Types” then “Collapse All” to make the “Supplies and Other” category visible.
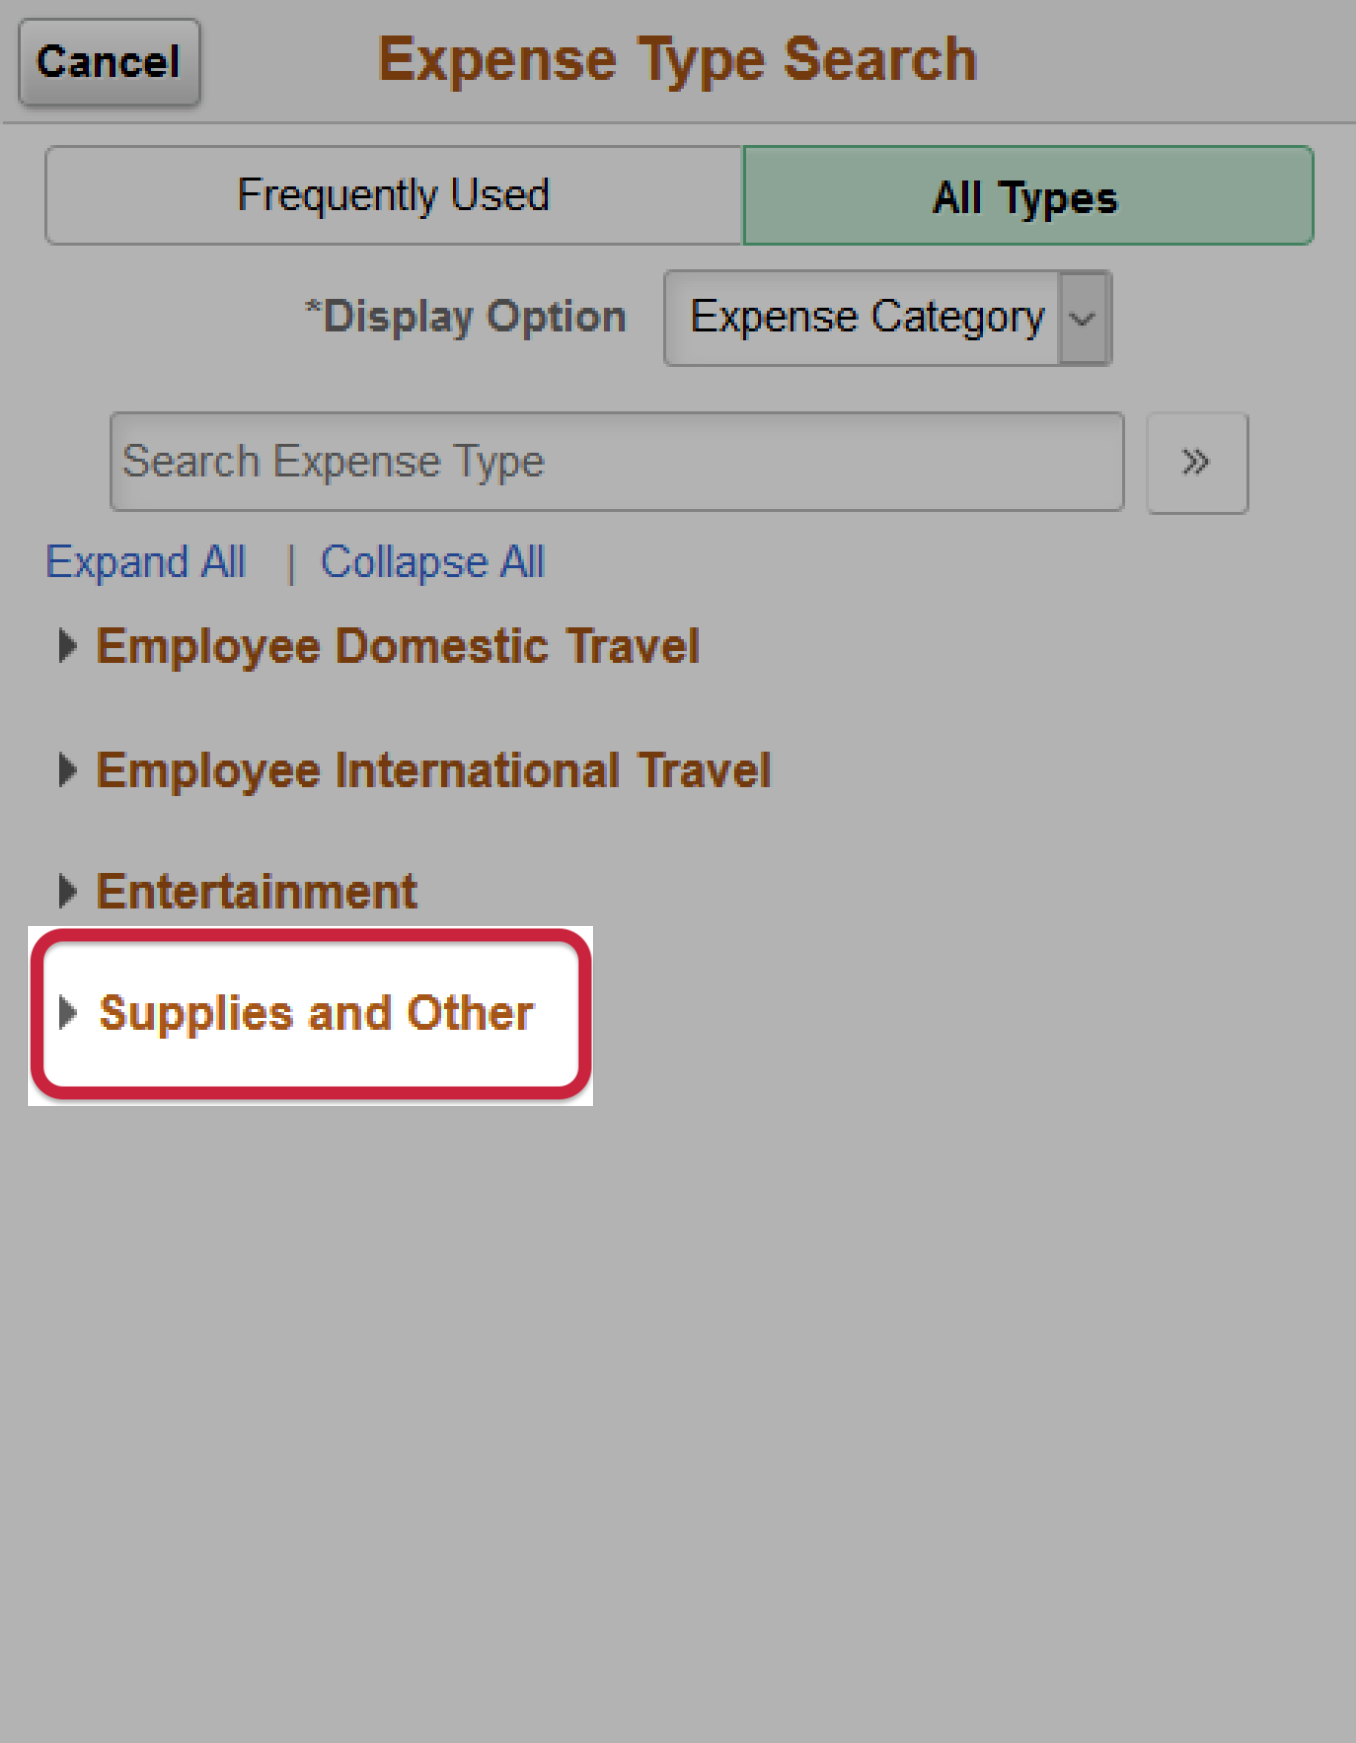

- Under the “Supplies and Other” dropdown select the option that most accurately reflects your expense.
- “Description“: include a description of the purchase including your speed type.
- e.g. “bleach for lab, 26XX000”
- “Payment“: Should always show employee paid.
- “Amount“: Fill in the amount on the corresponding receipt. If you are only requesting partial reimbursement please add a note about that in the description.
- e.g. “partial reimb for bleach for lab, 26XX000”
- “Merchant/Non-Preferred Merchant“: See next slide for information on this.
- “Expense Location“: type in Headquarters
Step 3
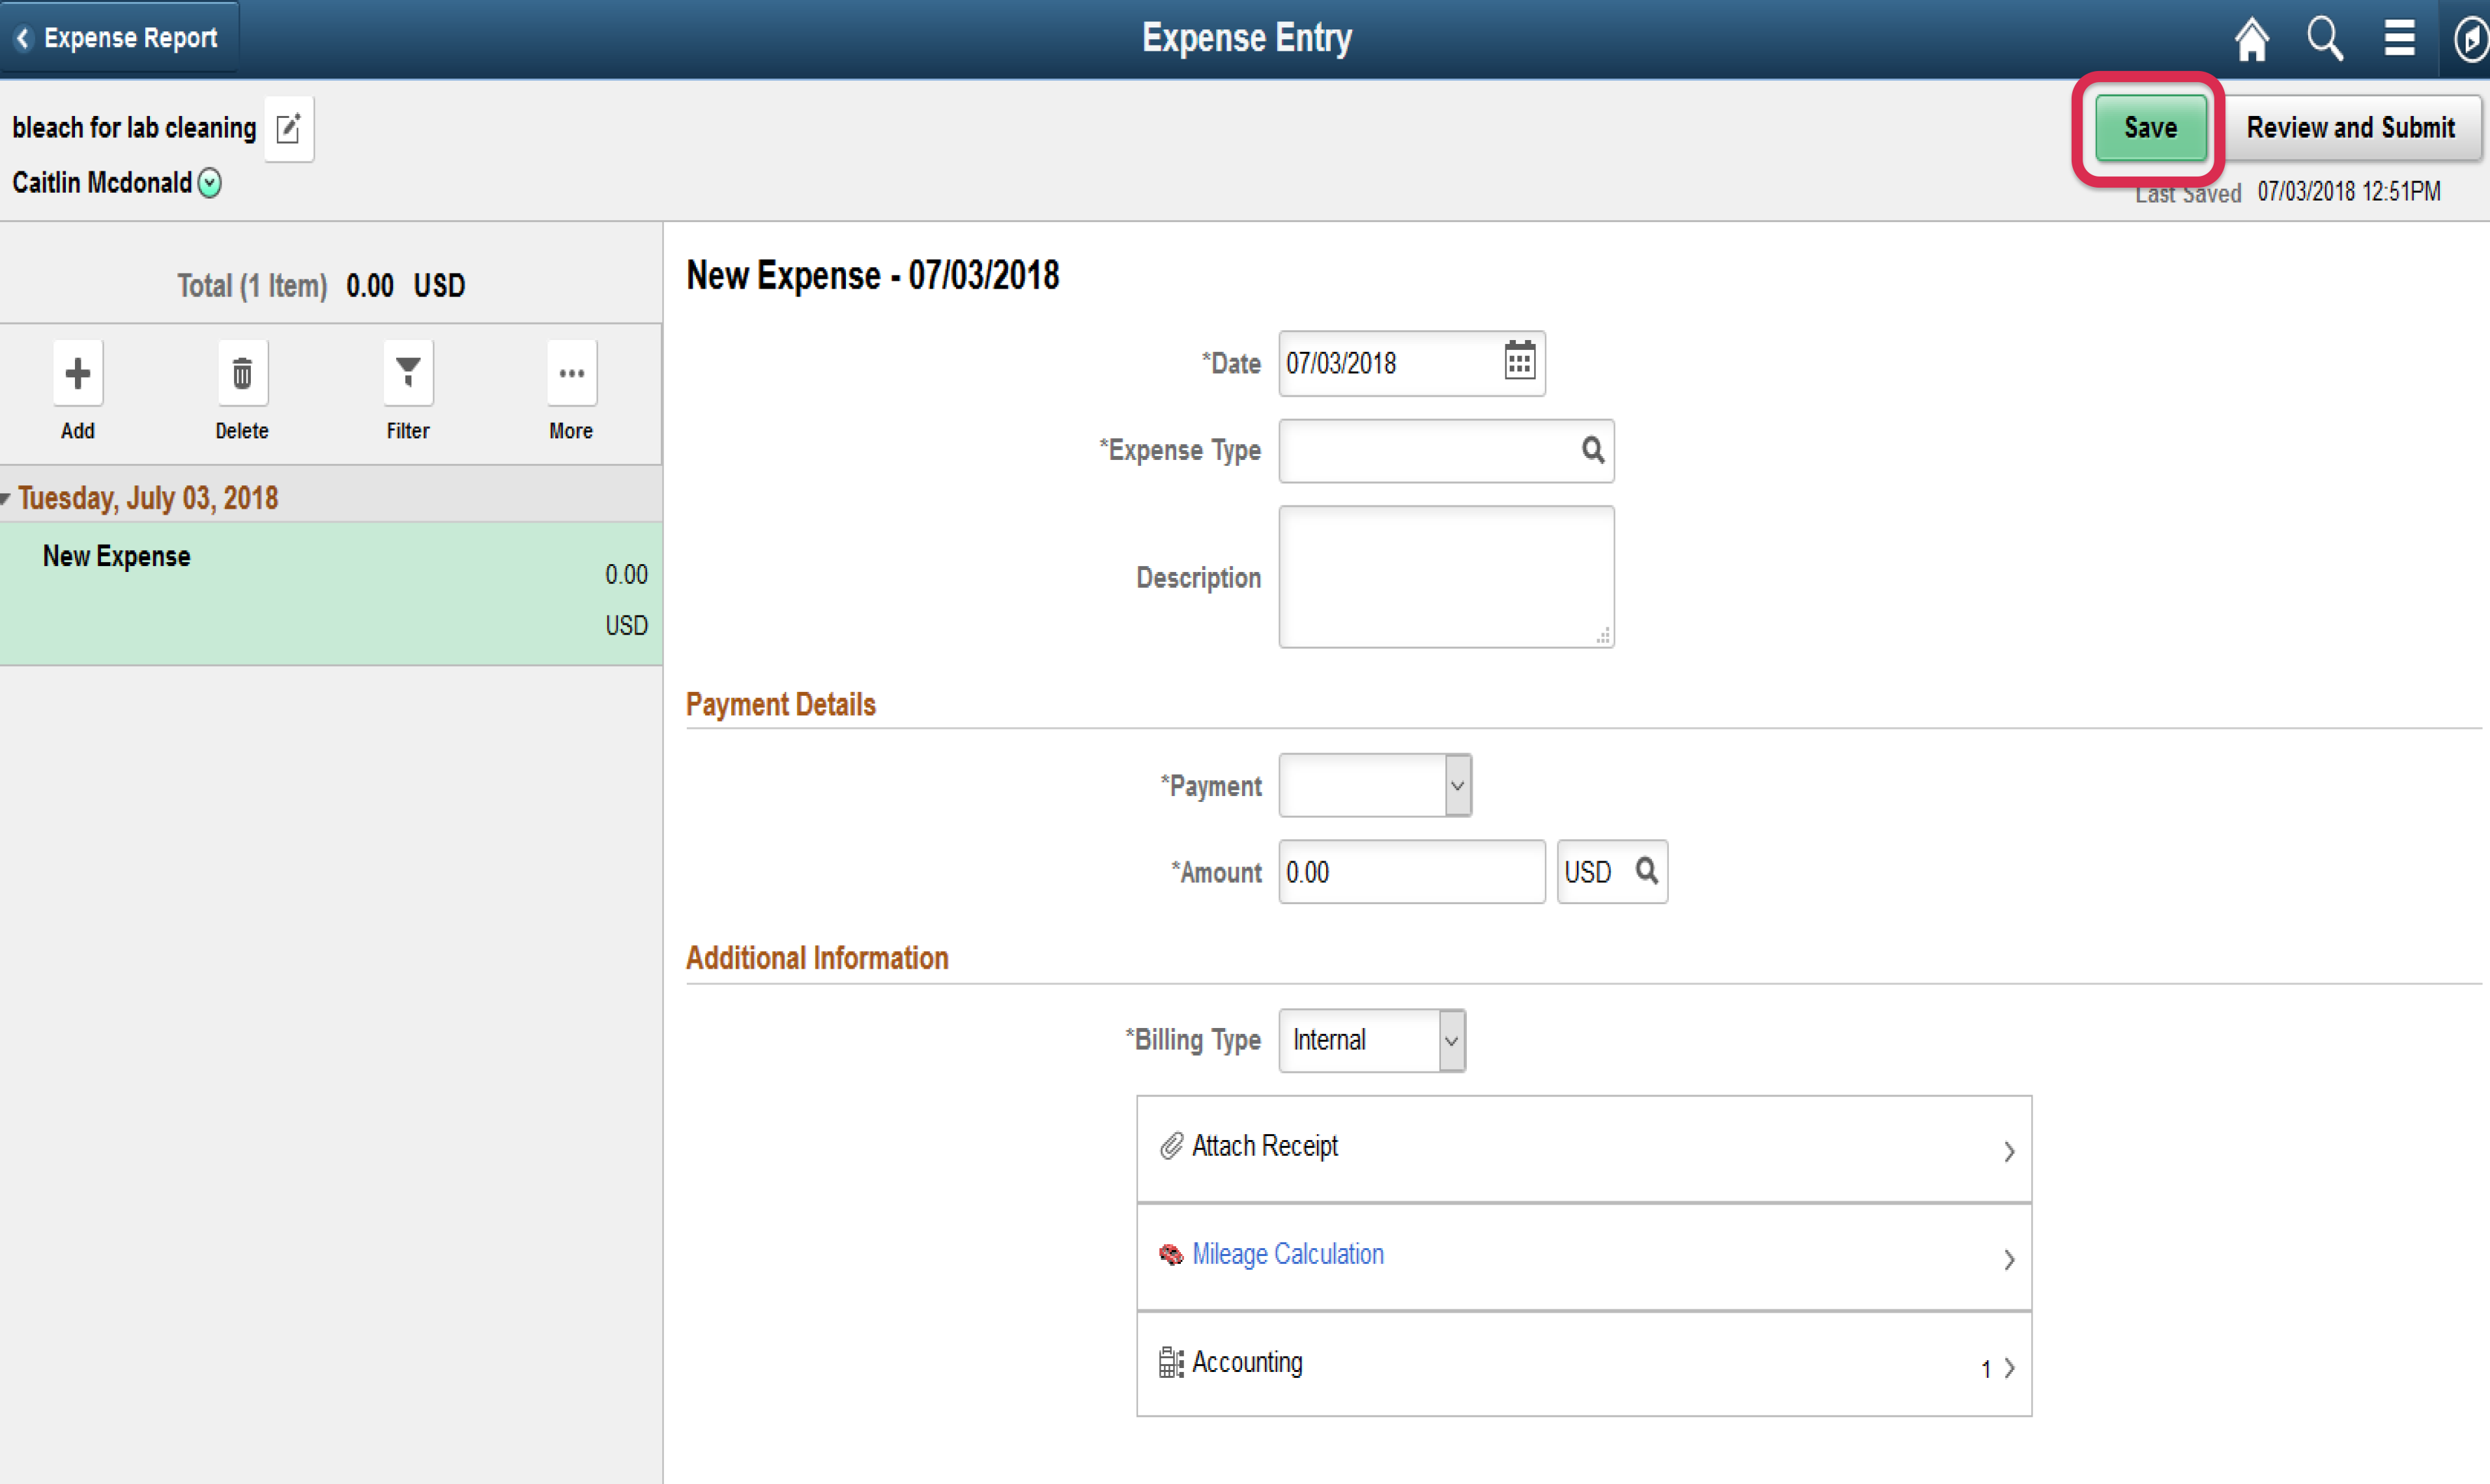
Click the green “Save” button in the top right.
This process should be repeated for each separate receipt you have so that dated receipts are separated and total amount requested for reimbursement matches your documentation.
If you attached your receipt(s) on the previous page you do not need to do so here.
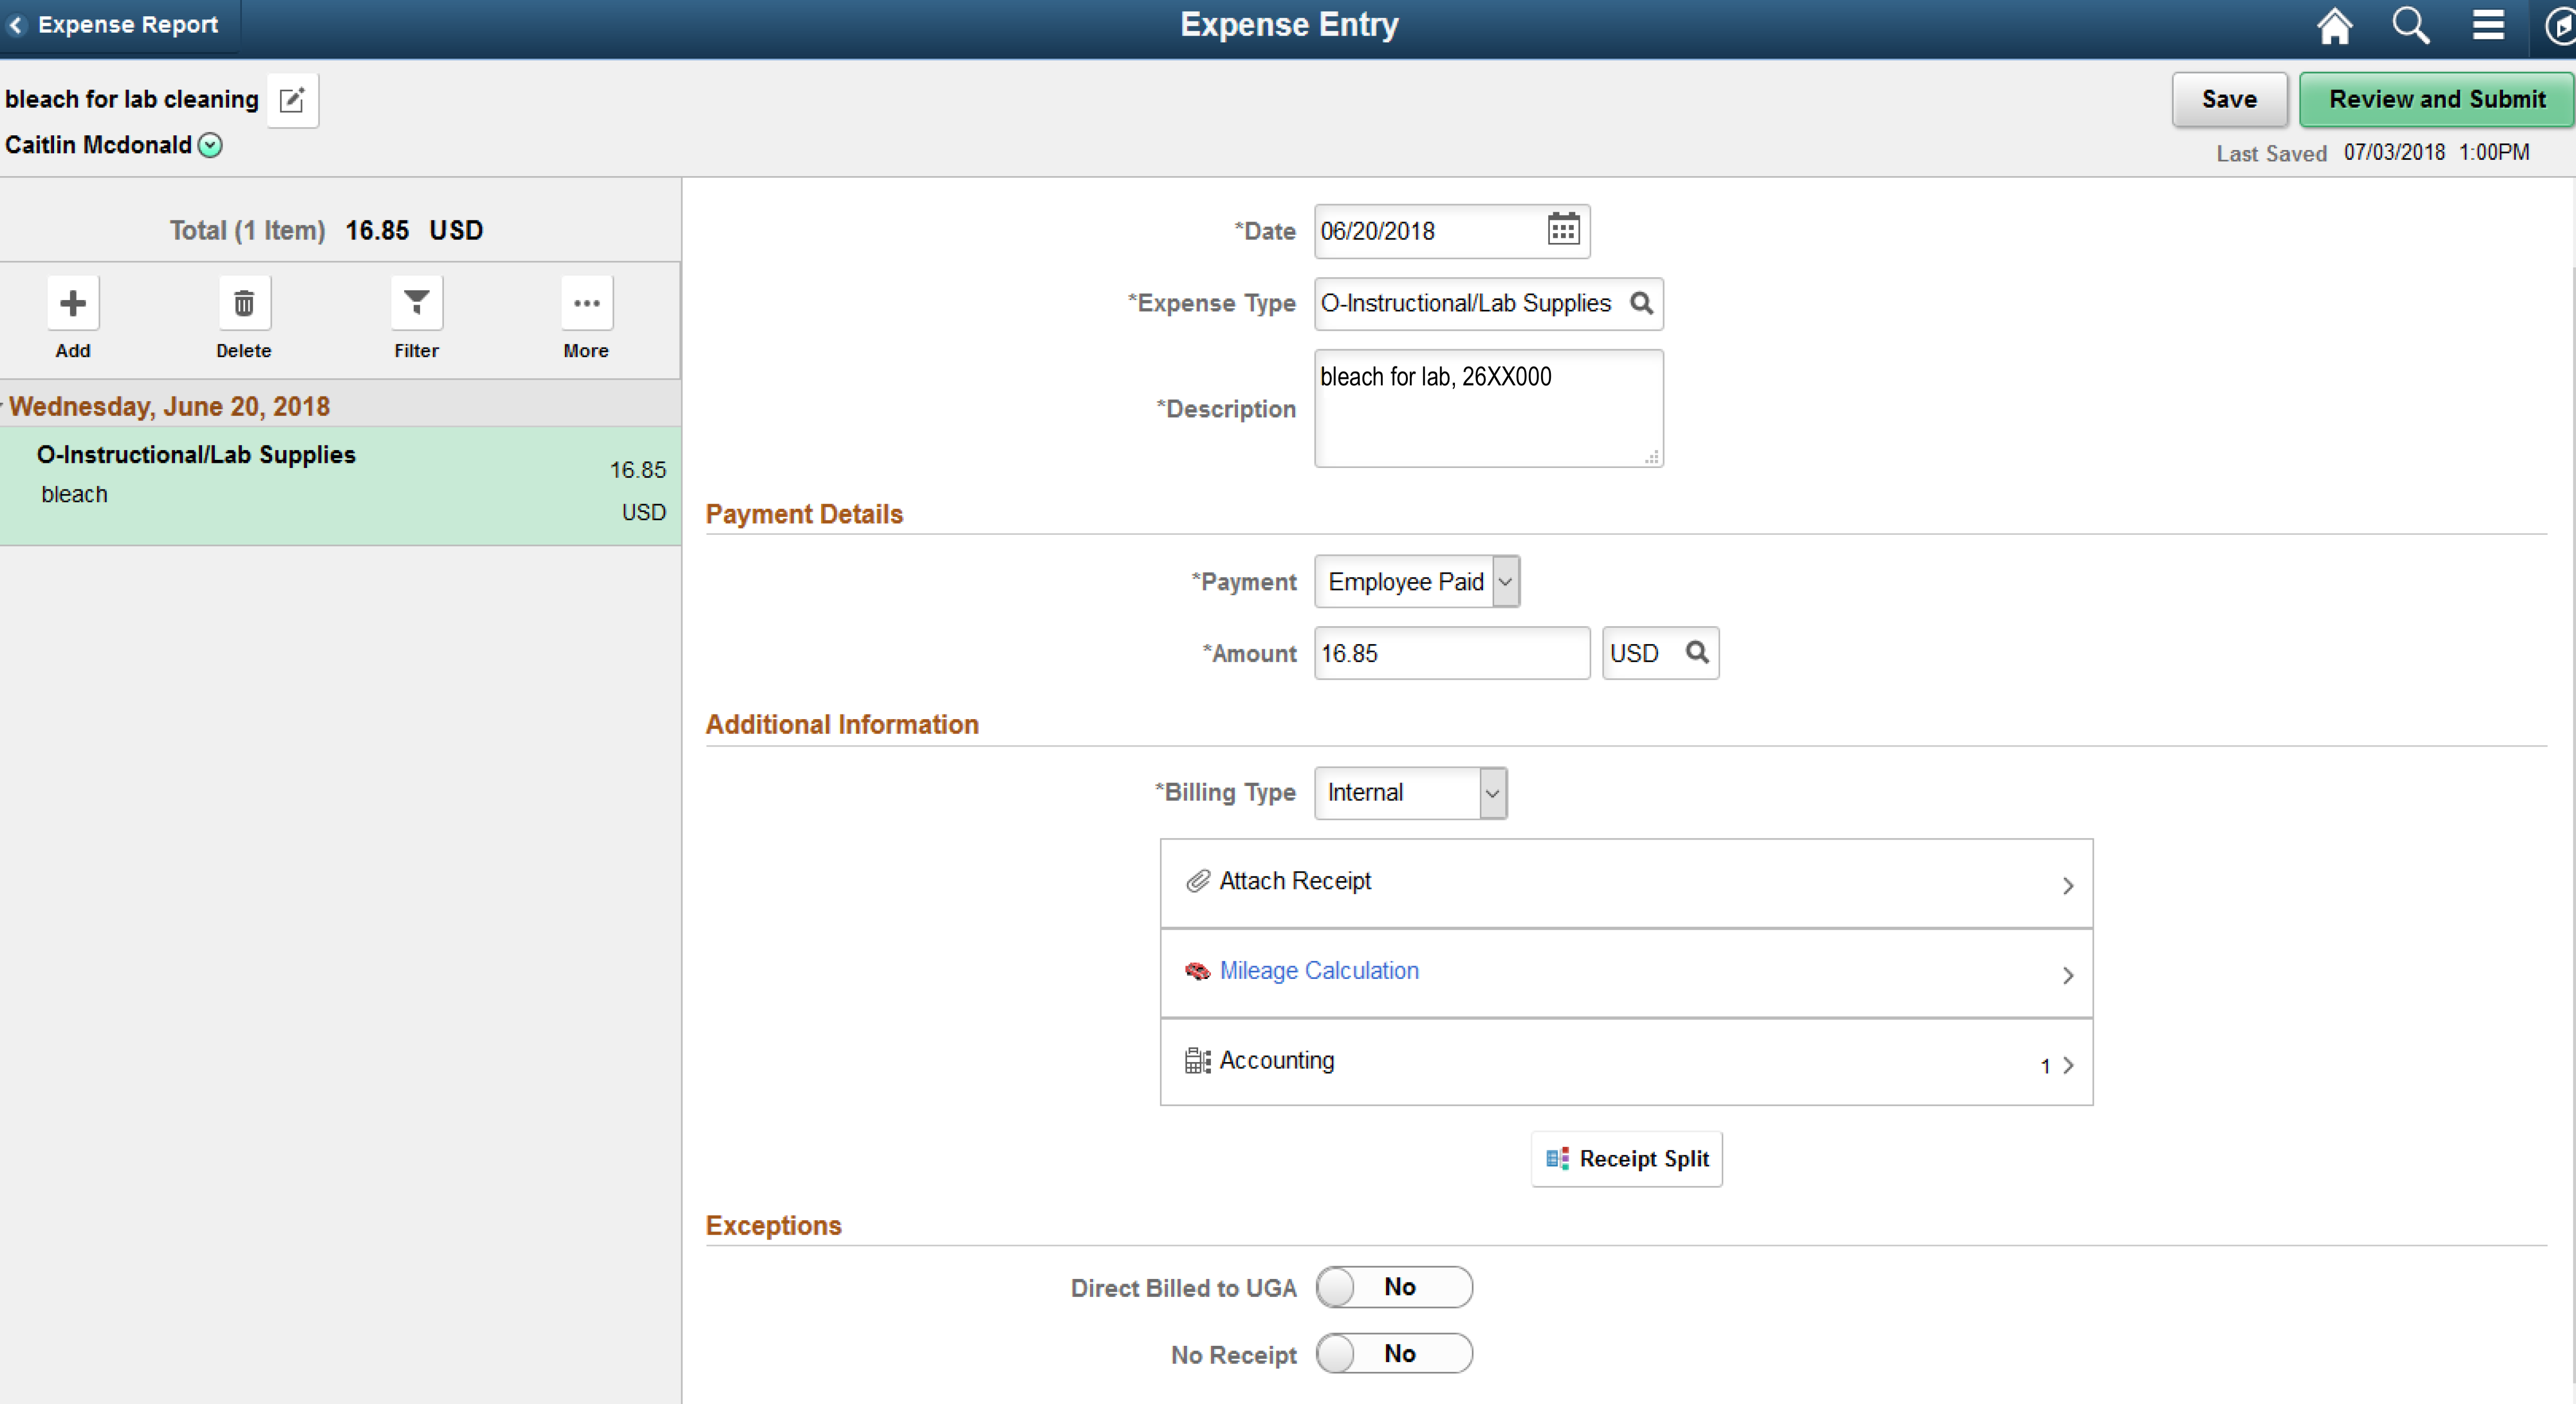
Note: All non-travel expense types will have an “O” in front of their description. This denotes it is an expense from the “Supplies and Other” category and not a travel category.
Step 4
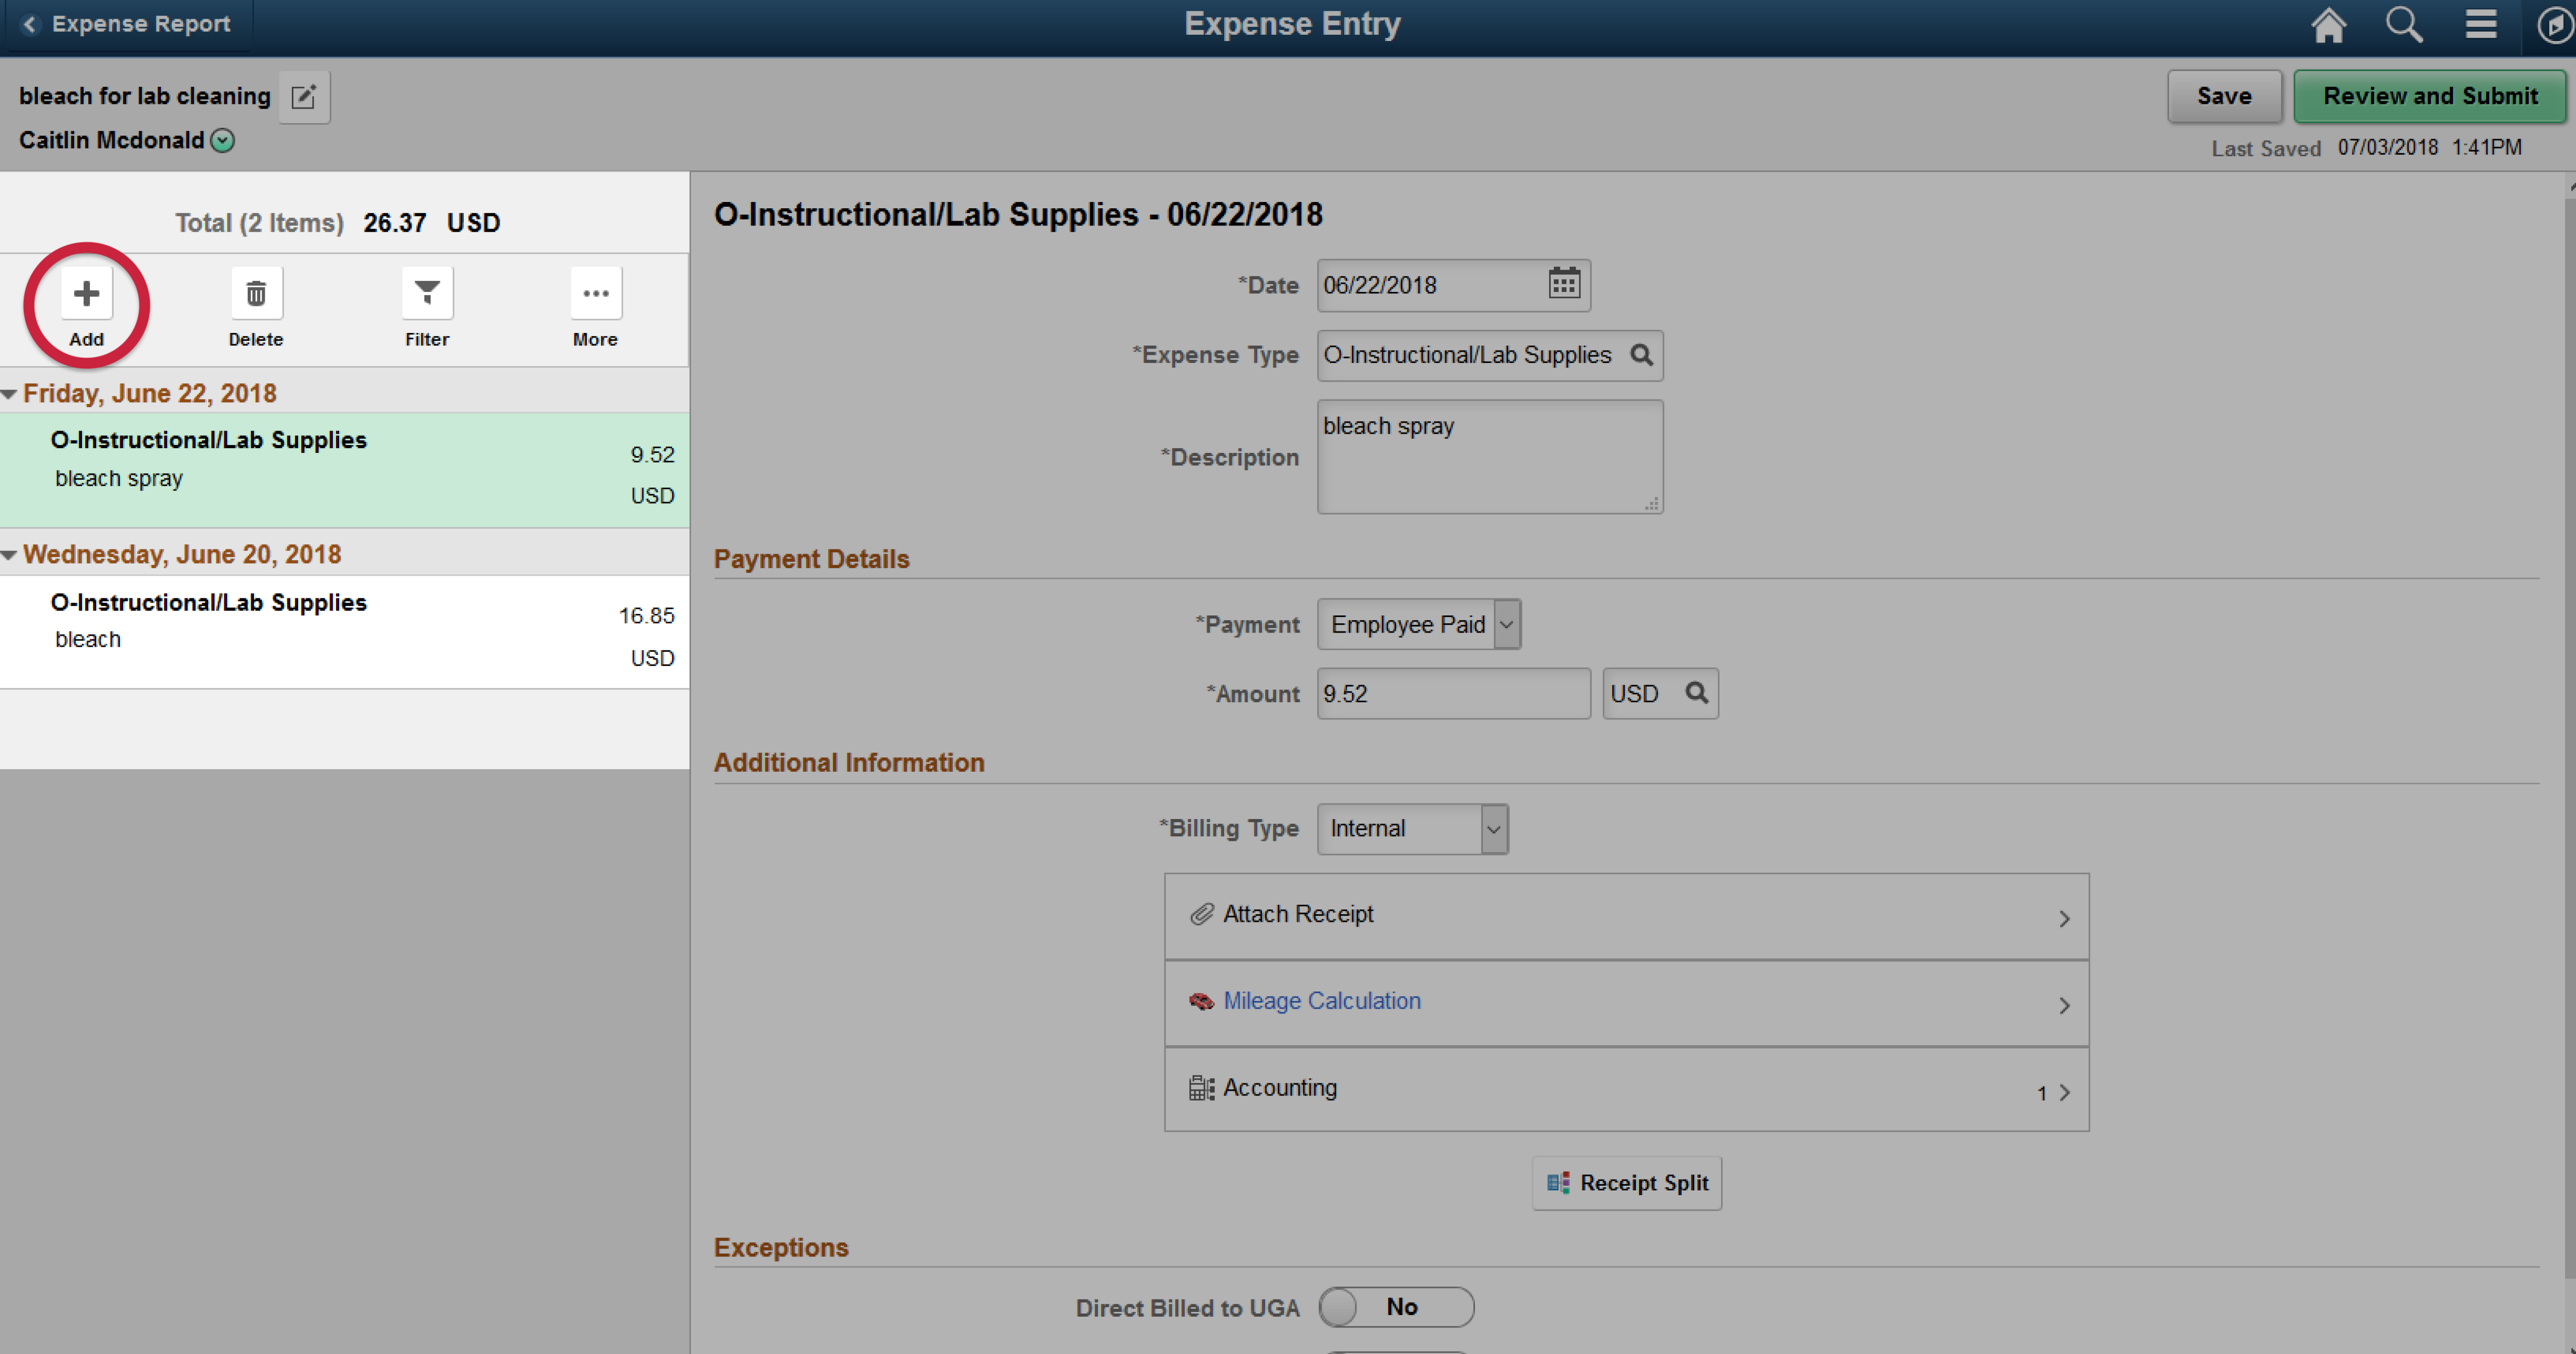
If you have multiple receipts click “Add” on the left side of the page and repeat Step 3 for the next expense.
Continue until all receipts are added. All the expenses will show on the left hand side of the screen as you add them.